Monday, January 23, 2012
The Sawyer Scott
Happy Scrapping!!
Sunday, January 22, 2012
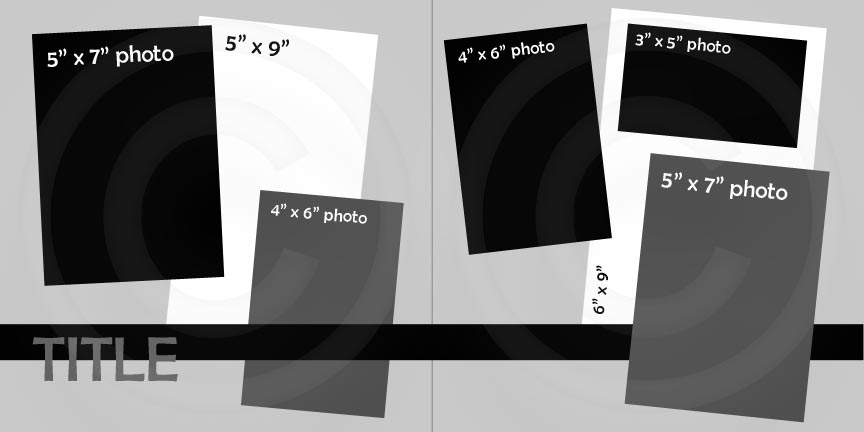
Sketch of the Week: 2012-01-22
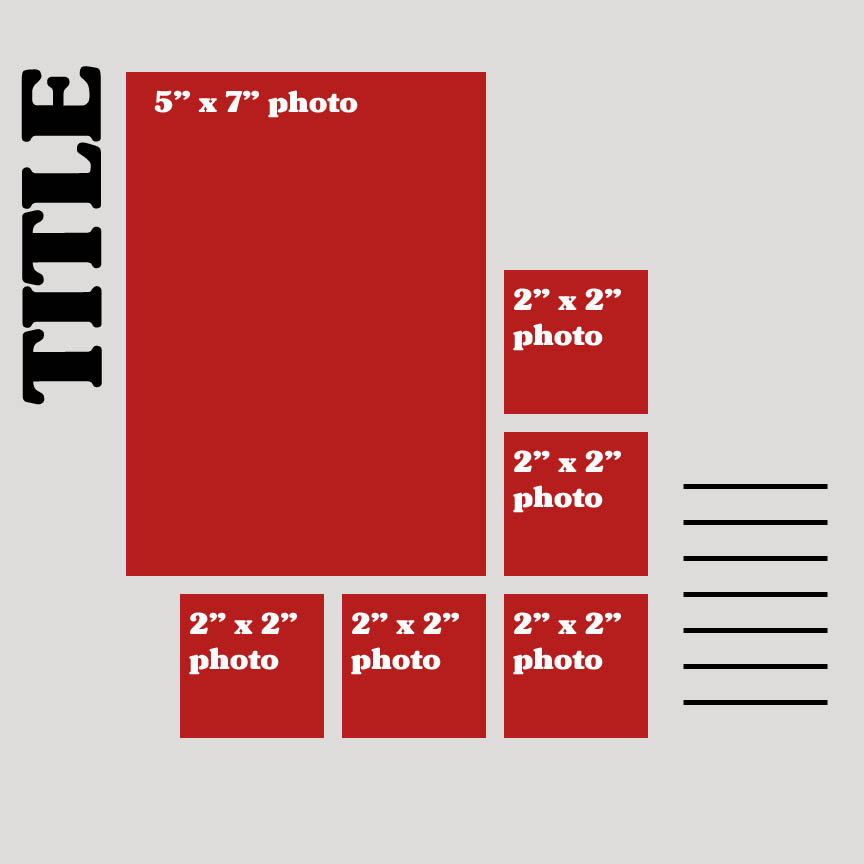
As you will find, my focus is usually on pictures (I love to take pictures) and journaling (I love to write), but you can always switch things up and replace pictures for embellishments or add even MORE pictures!! A sketch is just that....a draft to get you started....you can use it to get the creative juices flowing and turn it into something you love!
Happy Scrapping!!
Thursday, January 19, 2012
Scrapbooking Tools: Paper Piercers
Well, in its simplest form, a paper piercer is a handheld tool that looks like a large needle with a handle. It works a lot like a hole punch, but on a much smaller scale. The purpose of a paper piercer is, as its name indicates, to pierce paper, but instead of creating an eraser-sized hole (like a hole punch), a paper piercer makes a pin-sized hole.
A lot of scrappers will use it to make a hole in their cardstock when attaching brads because brads by themselves aren't sharp enough and have a tendency to rip your precious scrapbook paper. A paper piercer will make a nice pin-size hole in your paper for the brad to fit in. You can also use it to make starter holes for thread work, if you like to embellish your scrapbook layouts with fancy thread or ribbon.
You can find paper piercers at about an arts and crafts or hobby store and even on Amazon. They're inexpensive and a must, in my opinion, in any scrappers tool kit.
Happy Scrapping!
Sunday, January 15, 2012
Sketch of the Week: 2012-01-15
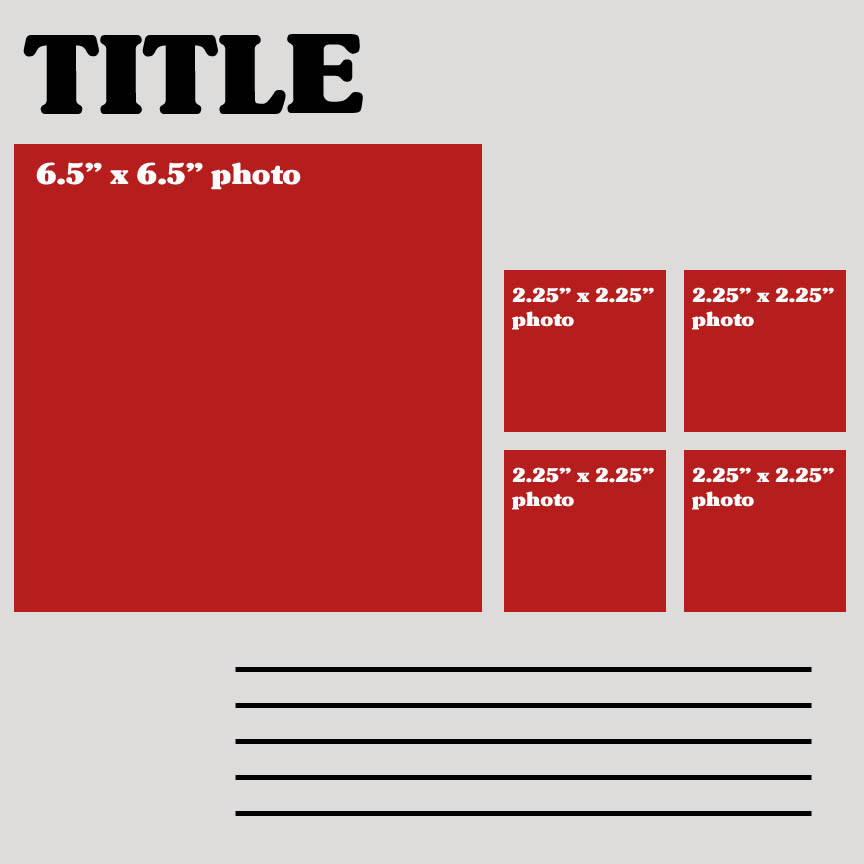
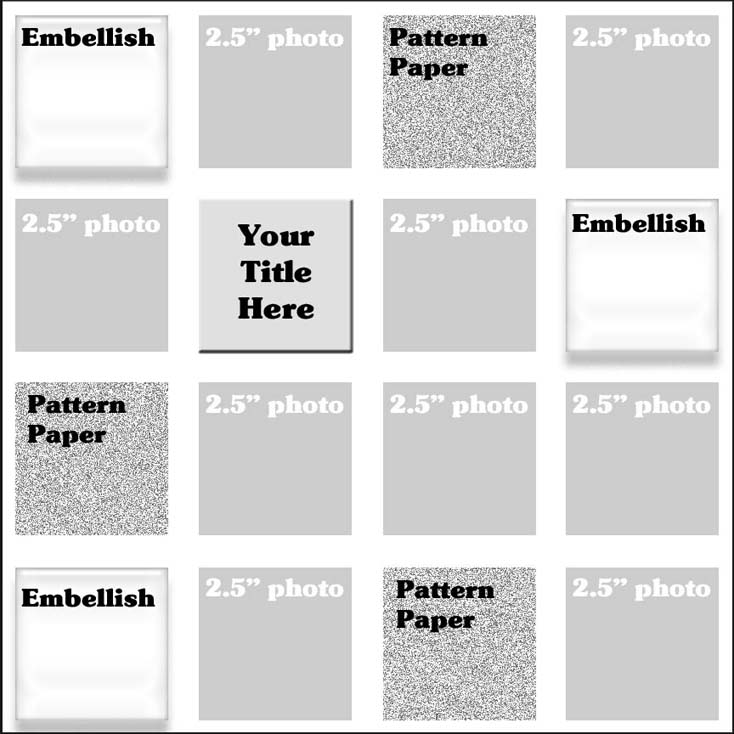
In either format, you can also swap out patterned paper or embellishments for the smaller square pictures and get creative with the title. You've got lots of space!
Don't forget to vote each week! Happy Scrapping!!
Sunday, January 08, 2012
Sketch of the Week: 2012-01-08
Happy Scrapping!!
Saturday, January 07, 2012
A Year in the Life - Week 1
Sunday, January 01, 2012
Happy New Year!!
Have a great week and Happy Scrapping!!
Thursday, December 29, 2011
Christmas Cards
They are little pouches and I actually used the same design for baby announcements earlier in the year. The finished product is a 5" x 7" card that is made from a 5" x 10" strip of paper with a 4.5" x 6.5" inlay. To finish up the card, fold up the bottom 3" of the 5" x 10" paper strip.
I've found that double-sided paper with a solid color on one side work best and the pouch format is great for those Christmas pictures!! Happy Scrapping!!
Tuesday, December 27, 2011
2012: A Year in the Life
The advent of smartphones with their built-in cameras means you always have a camera with you and since I end up doing a "year in review" for our annual Christmas letter anyway, I will be doing all my prep work throughout the year instead of all at once.
If you haven't heard of it, the challenge is to take at least one picture a day. It's very much like a diary, but in this case, a visual one and one that I will be sharing the progress and sketches for the resulting scrapbook pages. It starts on January 1, 2012 and I hope you will join me on this adventure!! Happy Scrapping!
Monday, December 26, 2011
Back from....the Other Side of the World
In this particular instance, I spent one week in Little Rock, Arkansas and promptly turned around and spent a week in Seoul, South Korea. I had never been to Asia before and it was a great experience, so I will definitely be going back (when it's warmer)!!
The good news is....the very long plane ride back allowed me to work on more sketches, so while my plan of handmade card sketches every week during the holidays kind of fell through, there will be more of those and of regular scrapbook pages coming very soon.
I hope everyone has an excellent holiday season and Happy New Year!!
Friday, November 25, 2011
Handmade Cards
Sunday, November 13, 2011
Sketch of the Week 2011-11-13
Hope you all have a great week and Happy Scrapping!!
Sunday, November 06, 2011
Sketch of the Week 2011-11-06
Happy Scrapping!!
Sunday, October 23, 2011
Sketch of the Week 2011-10-23
Have a great week and Happy Scrapping!!
Sunday, October 09, 2011
Saturday, October 08, 2011
Wedding Vow Layout
Monday, October 03, 2011
A Twist on The Clothes Pin Game
In my twist, everyone at the shower gets a large tag with a ribbon that they can wear like a lanyard. The tag has the baby's name or baby related words on it. Instead of starting out with a clothes pin, everyone starts out with one or two letters on their tag (attached using repositionable adhesive tabs). As you've probably figured out, the goal is to get other people's letters to complete your tag...if they say the "secret" word, you get to take one of their letters. The first person to fill up their tag WINS!!
The great thing about this version is that everyone gets to take their tag home to scrapbook as a remembrance of the event. Have fun and Happy Scrapping!!
Sunday, October 02, 2011
Scrapbook Consistency
Sunday, July 29, 2007
Valley Forge Review
So, you're wondering, how was it?...
Overall, I'd rate it a B. I could never rate (1) an opportunity for "me" time or (2) the opportunity to scrap or shop for scrapbook supplies in peace badly. But, while I made some really great layouts and bought A LOT of really cool scrapbook supplies, I was disappointed that I didn't learn more technique-wise, though it does harden my determination to go to CKU next year for sure!
Here's a review of all the clases:
A Thing or Two about Boys - This was sponsored by QuikQuotes. This was simply a process of building layouts based on their kits. The one thing that I did get reinforced is a neat way to make slide mounts match your layout.
LuCKy Girl - This was sponsored by CK and taught by Creating Keepsakes, Managing Editor, Brittany Beattie. We made a little scrapbook of the things were are most grateful for that fit in a little tin. Definitely very cool scrapbook...I see Christmas presents
All About Heritage - This was also sponsored by QuikQuotes. Again, it was simply a process of creating layouts. Neat way to do photo corners out of vellum.
Boys Go Zoom! - This was a class on board books, which I wasn't quite expecting. The board book was made with glossy chipboard - I had been thinking of natural chipboard. But...I did learn a cool way to make photo corners with ribbon (if enough people are interested - write me to let me know - I'll write something up about this, the vellum photo corners and slide mounts).
You've Been Framed! - This was a class on creating unique frames with your scrapbook supplies and was sponsored by Simple Scrapbooks. Nothing fancy or complicated, but a super-cool idea!
10 Things Every Scrapbooker Should Know - This too was taught by Brittany Beattie and was full of great little tips that "every scrapbooker should know," such as...it's OK to scraplift, it's OK to create a layout without pictures, it's OK to take LOTs of pictures and more! Definitely recommend it if they offer again next year.
Now, by the time I was coming to my last class...I was exhausted and knew that I had a long drive in front of me, so what probably would have been a lot of fun ended up being disappointing in a way.
Keep it Simple, Make it Quick, Get it Done with Metropolis - It's a really long title and was set as a two-hour class, but as the title states, it was simple. In fact, too simple for my liking at the time. I wanted to be challenged, but instead I was given a pack of Scenic Route scrapbook supplies with instructions to make four two-page layouts. Now, don't get me wrong, I'm not complaining about great supplies, but I wanted to learn something different and quickly realized that wasn't going to happen in this class. So, about an hour in, I decided to pack up and hit the road - even if I was giving up the chance to win a door prize.
Another year is done and I look forward to what next year will bring in my scrapbook education!
Thursday, July 26, 2007
Valley Forge (Part Deux)
- A Thing or Two about Boys
- LuCKy Girl
- All About Heritage
- Boys Go Zoom!
- You’ve Been Framed!
- 10 Things Every Scrapbooker Should Know
- Keep it Simple, Make it Quick, Get it Done with Metropolis
While my true goal is to make it to CKU one day, my experience last year was incredible and I learned so much (and came back with so many scrapbook supplies...I'm still digging out of that pile). Just keep your fingers crossed that the power doesn't go out!!
I will report back as soon as I get home on Saturday evening and share with all of you what I've learned.
Happy Scrapping!
Tuesday, July 03, 2007
Harry Potter Month
July 2007 is officially Harry Potter month!! With the release of the seventh and final book and the premiere of the fifth movie, it's all about Harry!!
Watch for Harry Potter scrapbook layout ideas all month long on my site!!
Sunday, June 17, 2007
Sketch of the Week
The votes for this week's Sketch of the Week are in and it's another 12" x 12" double page layout. This sketch calls for four photos and has LOTS of room for journaling.You could use this sketch as a basis for a layout to scrap your children's end of year party at school (focal shot is a class photo and the smaller ones can be more candid shots).
Or...you can flip your focal shot to make it vertical and it can be used for a birthday layout, with your child's birthday photo along with more pictures from the party.
Happy Scrapping!
Sunday, June 03, 2007
Need Sketches?

So...I'd ask that you take a minute and fill out this little survey to see if we can make everyone happy.
I'd love to hear from you. Happy Scrapping!
Sunday, May 27, 2007
Sketch of the Week - 27 May 2007

Sunday, May 13, 2007
Sunday, April 22, 2007
Sketch of the Week - 22 Apr 2007
This week's sketch is another 12" x 12" single. If you like this sketch, and want more like it, don't forget to vote for the Sketch of the Week at the Choubox Sketch Pad.
I've also started a new feature on my website - Scrapbook Challenges. The current challenge is using lyrics in your scrapbook layouts.
Happy Scrapping!
Saturday, April 07, 2007
Sketch of the Week - 8 Apr 2007
Any who...here is this week's sketch a little early, as I'm sure we'll be otherwise occupied tomorrow. Wishing you all a joyful Easter!
Happy Scrapping!
Thursday, April 05, 2007
Planning a Layout
But, over the past several weeks, several of you have requested articles that all revolve around the same theme, planning layouts. So, in the coming weeks, I will be making these articles my priority as, in the end, the basics of designing layouts are at the heart of scrapbooking.
Thank you again for all your input and Happy Scrapping!
Saturday, March 17, 2007
Sketch of the Week - 18 Mar 2007
You're getting an 8x8 single page layout because that's what my son picked, but you're also getting a 12x12 version because of his twin brother. :-)
I have to admit....it's been a crazy month and while I've kept up with my sketches...I've been lagging behind in just about everything else, thanks in part to a week's worth of illness and the preparations for my boys' 3rd Birthday Party. It seems like these past two weeks have gone on forever, but I'm very glad that they're over (and that the birthday party was a huge success). I'm very much ready to get back to my "normal" schedule.
Hope you have a great St. Patrick's Day!! Happy Scrapping!!
Wednesday, February 28, 2007
How Do You Make Your Scrapbook Layouts?
If I had to define my own style, I would describe it as simplistic with a BIG focus on pictures. I don't have a set way in which I create my layouts (I don't do them the same way every time), but I do follow a few simple rules…
(1) Always keep the focus on the pictures.
To me scrapbooking is not about getting as much "stuff" (embellishments) on a page as possible, but it's about telling a story…preserving your family's history. So when I create a layout, I make every attempt to use as many good pictures as possible. I won't try to put every single picture from an event on a layout, but I will try to put more than one. I will also make room for journaling or, at the very least, a quote, song lyrics, etc. that convey the way I feel about the event, person, etc. in the pictures.
(2) I like lines…
There is a common held notion that using lines helps to move people from one design element to another. Whether it be scrapbook layouts, brochures or any type of graphical design, our eyes will naturally follow a line from one item to another, so whether you use ribbon, embellishments or just strips of paper, a line in your layout will help the "flow."
(3) I also like squares…
Huey Lewis once said that it was hip to be square…and I tend to agree. I usually create 12x12 layouts because it gives me the most space to play with, but I also love the smaller sizes like 8x8 and 6x6 because it forces you to be more efficient. You don't have a lot of extra space on the smaller formats, so you don't necessarily have to worry about filling your page up with a bunch of embellishments. You get a picture or two on there; a title and some journaling and you're done!
(4) I love to play with color…as long as it matches.
I'm a big believer in experimenting with colors, but I'm also a big believer in less is more. To me, when using color, there is a fine line between just right and too much. As such, I will let the "colors do the talking" when I create my scrapbook layouts. I will find two to three colors that will really make the pictures pop and stick with that instead of going hog-wild with five different patterned papers. You'd be amazed at how much patterned paper alone can do for a layout.
(5) I like to "live" with my layout for a few days.
I was working on a layout for a recent article and once I got the basics down (sketch, title and photos)…I walked away. I didn't look at the layout until the next day and then added the patterned paper…and walked away until the next day and then I added the embellishments. I was absolutely thrilled with the finished layout because I took my time.
I do this partly because I don't necessarily have a ton of time (in one uninterrupted block) and I've found that I am SO much happier with the end result when I don't try and rush things. Are there times when I can sit down and, from sketch to finished layout, have one done in 30 minutes?… Sure, but I don't want to finish a scrapbook layout just to "pad my stats" and say I created 200 layouts in a year. I'd rather take quality over quantity. Why? Because what's the point in hurrying to finish a scrapbook layout, if after three days you look at it and say, "Oh, well, I could have done this…" or "I could have done that to make it look more balanced." I just like to take my time. If that means I only do 50 layouts a year – so be it.
I hope this helps to provide a little insight into the scrapbooking side of my brain. If you have any questions, please don't ever hesitate to send me an e-mail.
Happy Scrapping!
Saturday, February 24, 2007
Sketch of the Week - 25 Feb 2007
Also as a request of your requests, I'm in the process of finishing up my "Let's Get Organized" section and just launched my latest set of articles on scrapbook Tips and Techniques.
Have a great week and Happy Scrapping!!
Wednesday, February 21, 2007
The Masses Have Spoken...and Keep Speaking!
As you can see, when you complete the survey, most of you scrap in a 12x12 "world" and tend to make double-page layouts when you do. So...my future Sketches of the Week will tend towards that trend.
But...since this is a scrapocracy and I always learned that you have majority rule with minority rights, I will be mixing in some of the smaller sizes along with sketches for cards.
As always, if you haven't filled out the survey...let your voice be heard...you may end up swinging the balance to another size layout!
Happy Scrapping!!
Sunday, February 11, 2007
Sketch of the Week - 11 Feb 2007
Well, it's pretty simple actually (and a great use for double-sided cardstock). You just take a piece of paper, cut it to the size you need and then fold it in half. Why?... Because then you've just doubled the space you get to work with and since a 6x6 is pretty small, you can use all the space you can get.
You put pictures on the outside of the flap and have journaling on the inside or have photos on the inside and the outside. It's all up to you!
In this example, since the finished size is 2.5" x 2.5", you would need a piece of paper 2.5" (w) x 5" (h).
Let me know if you have any questions!
Sunday, February 04, 2007
Valentine's Day
It's just around the corner and while I used this design as a recipe card, it can do double-duty as a Valentine's Day card with a few modifications.
I used the new "Smitten" line from Paper Salon. Specifically, I used the Tiny Dot, Polka Hearts, Posy Paisly and Heart Paisley papers. This is a great double-sided cardstock line, so the inside of the card is a dark red pink.
Happy Scrapping!
Tuesday, January 30, 2007
They Grow Too Fast....
Where does the time go?... and can someone please tell me how to slow down the clock?!
Wednesday, January 24, 2007
Six 6" x 6" Scrapbook Layout Sketches
As you have seen, I do tend to focus on 12" x 12" layouts, but I will be the first to admit that smaller scrapbook pages are actually much easier to make. You don't have to focus so much on filling space, so you become very efficient and your emphasis is turned automatically to the pictures.
Since you don't have that much room to work with on a 6" x 6" page, the biggest picture you can use is a 4" x 6", which is perfectly acceptable (and makes the same kind of visual impact that a big picture would make on a 12" x 12" layout), but leaves you with little room for any journaling or embellishments.
So...that leaves us with 3" x 5" pictures or, better yet, wallet-size pictures. I love wallet-size pictures! Why? They have the same shape as a 4" x 6", but they take up less "real estate," so you can put lots of pictures on big scrapbook pages and more than one picture on a 6" x 6" scrapbook page.
While it's hard to find on my site, I do have a collection of sketches that I did almost a year ago (click here to open the file) that includes a set of 6" x 6" sketches. I just haven't gotten around to getting them loaded into Flickr.
To the person that asked, I hope this helps (and I'll work on getting more 6" x 6" double-page layouts drawn up), and to anyone else who has any other questions...don't ever hesitate to send me e-mail, I'm always ready and willing to help!
Sunday, January 21, 2007
Winter Has Arrived...
I'm very big on needing my four separate seasons and a winter without snow...well, isn't winter in my book. So, I am happy to report that it is snowing in VA - FINALLY!
Now, let the fun begin as the meteorologists begin to hem and haw over how much we might actually get!
Friday, January 19, 2007
Sketch of the Week
So...help me, help you. Take two seconds to answer these questions and future Sketches of the Week will lean with the majority. This is a "scrapocracy" after all!
Happy Scrapping!
Sunday, January 14, 2007
I'm Back...and so is Jack!!!

Hope you all had a nice week. I'm back from what can only be described as a somewhat lackluster trip to Atlanta. I will admit...the onion rings at The Varsity are the best I've ever had and the CNN tour is a must see, but the weather was yucky, so it put a little damper on our trip.
Anywho, I'm back and trying to catch up on things. Since I'm buried beneath five piles of laundry (and Jack Bauer (24) is back tonight), my Sketch of the Week will be up tomorrow instead of today.
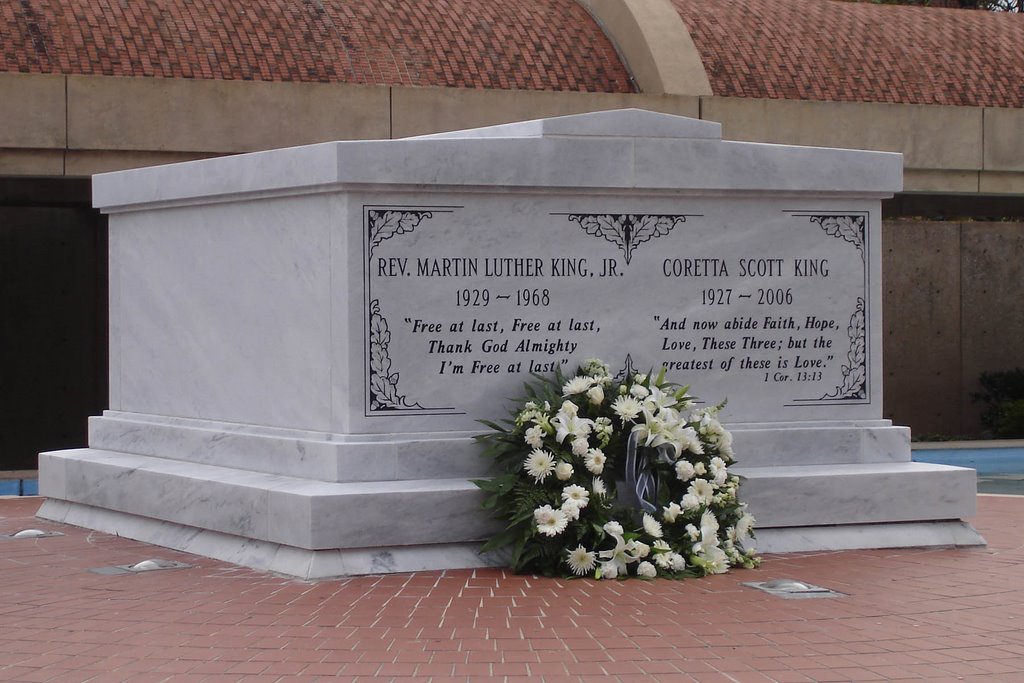
And since tomorrow is Martin Luther King Day, let us take a minute and remember the sacrifices of those who came before us. As I sat in Ebenezer Baptist Church on Friday evening, they had one of Dr. King's sermons playing and his words, spoken more than 40 years ago and during a very different time in our country's history, were eerily relevant. He spoke of today's young people being cynical and disillusioned and our men only having war to "look forward to." Let us all be thankful for the freedoms we have, for the freedom our Men and Women in uniform continue to protect and for those who are willing to stand above the crowds and have the courage to give those who still don't a voice...a chance.
Take care and happy scrapping.
Friday, January 05, 2007
Sketch of the Week - 7 Jan 2007
Originally uploaded by choubox.
Here is your sketch for the week. I realized after I posted this that I forgot to put the measurements on here. The big picture is a 5"x7" and the three small pictures are wallet size. The thick black stripe is 3" wide and the smaller gray stripes are 1.25" high.
I'll be partially out of the loop in Atlanta this week. After my success in Vegas at a LSS, I was hoping to stop by the Archiver's down there, but it's just too out of the way... Oh well, I don't need anymore paper anyway.
Happy Scrapping!! :-)
Thursday, December 28, 2006
Blue Man Group
Blue Man Group
Originally uploaded by choubox.
Yes, I did actually go to Vegas...which is why I'm way behind on my sketches. :-)
Thursday, December 21, 2006
Merry Christmas
Christmas Cards 2006 (Version 1)
Originally uploaded by choubox.
As the card says, "From Our Family to Yours...." Merry Christmas and a safe and Happy New Year.
Happy Scrapping!
Thursday, November 30, 2006
Christmas Layout Idea Mini-Book
Bonus Sketch
Originally uploaded by choubox.
Between Thanksgiving and Christmas, the scrapbook layout opportunities come flying at us as fast as Santa's sleigh. Some are for gifts and others are just additions to our ever-growing collection, but there never seems to be enough time.
So...instead of stressing about how you're going to scrap your children's Christmas pictures or pictures from a recent cookie exchange...get ready to celebrate the 12 Days of Christmas - Choubox Style.
Get your copy of the Choubox Christmas Scrapbook Layout Idea Mini-Book Today!
Saturday, November 25, 2006
Sketch of the Week - 26 Nov 2006
Check back later this week for some "finished product" examples.
Tuesday, November 21, 2006
O Tannenbaum!
This layout was created based on my current sketch of the week. It's a digital 12x12 layout that I created using some great paper from www.scrapbook-elements. com and embellishments from Atomic Cupcake.
Wednesday, November 08, 2006
The Digital Alternative
Saturday, November 04, 2006
Family Recipe Scrapbook
Sunday, October 22, 2006
Sketch of the Week - 22 Oct 2006
Happy Scrapping!
Tuesday, October 10, 2006
I Want Candy
Happy Scrapping!
Wednesday, October 04, 2006
Falling Leaves
I discuss ideas on fall foliage layouts and scrapbooking food.
Happy Scrapping!
Saturday, September 30, 2006
Scrapping for a Cure
It's on sale for only $.50 in celebration of Breast Cancer Awareness Month, which starts tomorrow.
Each paper pack includes five digital backgrounds and a FREE embellishment.
And coming in October... be on the look-out for my Scrapjazz article on ideas for memorial and celebration layouts.
Happy Scrapping!
Sunday, September 03, 2006
New from BasicGrey
Happy Scrapping!!
Friday, September 01, 2006
Bazzill Basics and SEI
Now...Bazzill has formed a similar "partnership" with SEI and provided us with an invaluable list of cardstock colors that match some of SEI's most popular patterns.
Enjoy!!
P.S. To tell you the truth, you will be hard pressed to find a patterned paper that doesn't match with any of today's hottest patterned paper. Thank you, Bazzill!
Tuesday, August 29, 2006
Embellishments...The Oriental Trading Way
Of course, they have your traditional brads in a myriad of colors (how does 150 for only $2.95 sound...), but they also have jeweled brads and ones that look just like eyelets. And what's even cooler are their themed brads like...
Candy Corns,
Christmas Trees,
Neckties and Bow Ties (for Father's Day),
Dog Bones, and for all your Las Vegas Layouts...
Casino Brads in the shape of poker chips and dice.
Check out Oriental Trading today!
Saturday, August 19, 2006
I Found Them!!
But, as if he was leading me to him, I accidentally drove to Norristown while looking for a supermarket in King of Prussia one day (while at CKC-Valley Forge). When I got home, I started digging and found information that lead me to believe he was buried there...less than a mile from where I had been. Arrgghhh!!!
Fast forward to my second trip to Philly in less than a month.
With the boys napping in the car, and time to kill before the Wiggles concert, we drove up to Norristown to check it out. The cemetery is huge and the main office had yet to return my inquiry, so I was crossing my fingers that I would find him (and anyone else that was related). As we drove through the cemetery, I gave my husband strict instructions on what names to look for, oh and we were finding them,...all but the one I was really looking for. To quote me, "He's so close I can taste it," and as if he heard me from above, I look up to see a huge family marker. "Yes, Yes, Yes!!!" I tried to contain my excitement as the boys were still sleeping. I scrambled to find a place to park and grab my camera and hoped that my great-great grandparents were there...and they were, along with my great-great aunt and uncle. Relief set in as I was able to verify another fact in the family story.
Tuesday, August 15, 2006
Scrapbook Sketches: Opposites Attract
Friday, August 11, 2006
On Being a Perfectionist
Scrapbooking isn't about being right, perfect or precise, it's about the person that benefits from it being perfectly happy that you made them something.
Friday, August 04, 2006
Staying in Fashion with Pantone Color Reports
Thursday, August 03, 2006
Text Circles in MS Word
Looking to make a text circle for a CD cover or to put a cool twist on your scrapbook journaling, but don't have scrapbook software? Not a problem - text circles can be easily created in MS Word using the Word Art function. Just use the following steps:That will bring up the Word Art Gallery dialog box. You want to select the third option from the left in the very first row. It doesn't have a specific name, but it looks like bowed text. Click OK.
Your text will not automatically appear in the shape of a circle, but it's easy to do. You will notice white guide boxes that surround the text that would form a triangle if you "connected the dots".
Your text will look like a flattened circle at first, but your white guide boxes will help to fix that. You should see two in the middle of your text image.
Happy Journaling!
Monday, July 31, 2006
CKC - Valley Forge Review (Friday)
As I drove up to the Convention Center at 10 minutes to 9:00, I saw a mass of women standing outside the building. "Oh no," I thought, "…It's going to be a mad house in there", but honestly, was I expecting anything less? Not really. So, I took the bare essentials, headed towards the doors and who do I see, but Lisa Bearnson (founding editor of CK) signing autographs. I snap a few initial pictures – you didn't really think I'd go without a camera did you... and find the end of the line. No sooner had I done that did I hear that the power was out in the convention center and they had no idea when it would be back on (hence, Lisa was outside signing autographs, which was very nice of her).
Resigned to our "fate", some of us stood in line waiting to meet Lisa, others chatted with their friends and others burned over-priced gasoline sitting in their air conditioned cars. I don't know how long it really took for me to actually meet Lisa, but I'm pretty sure it was at least 45 minutes…and still no power.
So, we continue to "hang out" in the ever-increasing heat and humidity….waiting. I chatted with several different ladies and just took everything in. For so many women being kept from scrapping and/or shopping, not a one was cranky, feisty or in a bad mood. It might have been the free ice cream sandwiches that the folks from Skinny Cow were handing out. Who can turn down free ice cream at 10:00 AM?!
Another hour passed and they finally let us in. We were all admittedly drained from the heat and giving each other a pass on not being as "flowery" as we would normally be. Given that it was already 11:00, I was headed straight to class as opposed to the vendor faire, but after I got into class, I was so glad to be there, as this was a really cool one.
It's All About You Ruler Book (5 out of 5)… Our instructor was Debbie Hill – lead designer for Junkitz – and she was just plain cool. She had us laughing from the get-go, insisted that we get excited if we won a door prize and took us step-by-step through a GREAT project. It helped that we had two hours to complete it, but my thoughts are that each class should be at least an hour-and-a-half.
In Living Color (5 out of 5)… They warned us that the Bazzill + BasicGrey class was fast-paced, but it was nothing compared to this one. Despite the circumstances, you couldn't help but feel for our instructor… She had just come back from CHA, so she had probably been home for all of two minutes – just enough time to switch the clothes in her suitcase. It took her 22 hours to get from CA to PA and when she arrived the power in the hotel was out, so she had to sleep on a sofa in the lobby. And… to top things off, her new boss provided her with the ideas/supplies for kits, but hadn't bothered to put the kits together. So, her assistants were building them on the fly. The great thing was it somehow worked. As crazy as things seemed, we made six layouts in a little over an hour and all I have to say it keep your eyes out for the new Scrapworks paper because it is BEAUTIFUL!
Accordion Mantle Book (5 out of 5)… When I walked into class, I was exhausted from the day's events, but encouraged to see Debbie from my other Junkitz class was our instructor. Secretly, I was doing jumping jacks as I loved her class from earlier in the day. In this instance, she had asked for some help, so several of us volunteered to get things set-up, which, if asked, I recommend doing because as I quickly determined you get free supplies as "payment".
Despite the crazy start, Friday was by far the best day out of the three and I had to laugh at my appearance by the end of the day. I had somehow managed to get ink all over myself – it was even on my arms – so I resembled the name of the ink we had been using all day – black soot. No worries though, because I had two altered books and six layouts to show for it!
CKC – Valley Forge Review (Thursday)
I arrived in Pennsylvania late Wednesday night, so I wouldn't have to rush Thursday morning to make my 10:00 appointment at Ursinus College. And so we begin…
Thursday was almost a blur thanks to the oppressive heat and humidity and the Pennsylvania roads. I will preface what I'm about to say with the fact that I normally don't get lost, in fact, I consider myself quite the "navigator", but someone must have slipped Jack Sparrow's crazy compass into my car, or into Google Maps…, because I ended up everywhere but where I needed to go. I'd turn one way only to find a dead end. I'd think I was back on the right track only to find that the street I thought I could use was one way – in the wrong direction. Let's just say it got to the point where I broke down and made a $12.95 investment in a Metro Philly map, and yet… that didn't even seem to help, so I guess I'll chalk it up to good old O.E. (Operator Error).
I did make it to Ursinus, but with just enough time to walk across campus to the library, where I was to meet with the school historian to go over some of my ancestor's records. The experience was amazing. To quote Jack Nicholson, reading about my great-great grandfather, "…makes me want to be a better man", or in my case, woman. He had an amazing, though short, life and made such a contribution to his community. It made me think seriously about what I could do to "make a difference", if even just to one person, so we'll see where that takes me, but for now I'll concentrate on my two little buddies. Despite all the information I was able to gather from the school records, a few inconsistencies remain, so my search continues.
By the time I had finished in Collegeville, I had a little extra time, so I headed towards Valley Forge, hoping that the hotel would let me check in early – they did. I only had two classes on Thursday evening….CK's Block Party and Monogram Madness.
CK's Block Party (3 out of 5)… I can only describe the instructor for this class as the Energizer Bunny on a sugar high. I don't know if she was nervous, or just wasn't a good instructor, but she was talking so fast and taking breaths so infrequently, that I felt out of breath by the time our class was over.
Out of all the classes, this was the most design based and focused on how you can use squares and rectangles in your layouts to create movements and symmetry. The layout was pretty cool, but we got so wrapped around the proverbial axle (at all the wrong points) that we never got very far, though we did have the instructions, so I am in the process of finishing it up.
Tips from class - You can use the index prints from your developed film as additional space fillers/embellishments on your layouts. Also, you can stamp an image on a square piece of paper, cut it into four pieces and then used glossy accents over top of each piece to make them look like tiles – very cool effect.
Monogram Madness (2 out of 5)… This class was slightly misleading. I figured we'd be making one of those super-cool chipboard monograms that are embellished to the hilt, but alas, this class focused on stamps and we spent the first 10-15 minutes cutting out stamped images. The layout that we made was OK, but I found the most beneficial information came in the form of some cool tips that our instructor shared with us. For those of you that stamp a lot, this was probably obvious to you, but to a "non-stampers" they were some pretty neat tricks.
For example, to add a pattern to stamp, you do the following:
You can "kick this up a notch" and add a border around your image by taking a dark marker and coloring the edges of the stamp (kind of like you would do to a piece of paper and an ink pad).
Who knew stamps could be so versatile?!
Friday started with a bang…literally – courtesy of Mother Nature. A line of violent storms came charging through Valley Forge during the VERY early morning hours on Friday. It woke me up and, as I would find out later than morning, knocked out power to the convention center and adjoining hotels. Let's just say we were all a little worn out by the time the day actually started.
More to follow…
Wednesday, July 26, 2006
A Trip Back in Time
My Destination: SE Pennsylvania (more specifically...Collegeville and Valley Forge)
The former to visit Ursinus College and have some fun digging in the archives to learn some more tidbits about my ancestors. The latter to go to the Creating Keepsakes Conventions - three days, nine classes and more scrapbook supplies than any woman should be allowed near with a credit card. :-)
I haven't finished packing, but that's OK...that's normal. I've packed for a week long trip to Germany in less than an hour before, so I should be fine, as long as I don't forget my glue dots!!
More to follow....
Sunday, July 23, 2006
Wedding Anniversary Journaling Checklist
So, why not make a "Then and Now" scrapbook layout and use the following questions to spark your journaling (and see just how much has transpired, since you both said, "I do"):
NOTE: Don't limit your trip through time to political events, but look at businesses that were around when you were married or your hometown sports teams. When the Senators left Washington, D.C., no one thought baseball would ever return, but again…here we are.
Happy Scrapping!!
Friday, July 14, 2006
Starter Tips for Photoshop Elements
As the process of learning PSE can be daunting, we thought we'd share a few tips with you to get you going.
To resize an image, you can use Alt+Ctrl+I or go to the Image Menu, select Resize and then Image Size. The same dialog box will appear with either option, it just depends on whether you like to use Shortcut keys or not. You then have the choice of resizing your image by percent, inches, centimeters, etc.
To change your photo to black and white, go to the Enhance menu, select Adjust Color and then Adjust Hue/Saturation (or Ctrl+U). You then want to pull the Saturation setting all the way to the left (so it equals -100).
To create a sepia-toned photo, you open the Adjust Hue/Saturation dialog box (Ctrl+U) and click on the colorize checkbox. Then, drag the hue slider from left to right until you find the color you like. For a brown tone, the hue value should be around 40. To create a deeper or lighter tone, just adjust the saturation slider until you get the effect you like.
NOTE: These effects will change the actual pixels of the image. If you just want to create a layer, that will leave the original image intact, you can create an adjustment layer that will create the same effect (Layer Menu --> New Adjustment Layer or click on the half-black/half-white circle in your layer window and select Adjust Hue/Saturation).
Happy (Digital) Scrapping!!
Come Join Us at Flickr!
Wednesday, July 12, 2006
The Main (Scrapbooking) Event
Happy Scrapping!!
Monday, July 10, 2006
There's Nothing Basic about Bazzill Basics Cardstock!!
Enjoy!
For more information on selecting colors for your scrapbook layouts, check out our article on color!

Tuesday, July 04, 2006
Free Digital Scrapbook Download - Yellow Ribbon
There is no charge to you and you can download as many times as you need to. Just right click on the picture, select "Save Picture As" and save it to your hard drive. The *.png file is only about 29 KB, but is saved at 300 ppi and the background is transparent (despite it's appearance here on the website).
We here at Choubox Scrapbook Design wish you and your family a very happy and safe Independence Day!
Friday, June 09, 2006
Father's Day Gift Idea
Why not try a "scrapbook" gift? It doesn't have to be complicated. In fact, it's very simple and can be done in less than an hour.
Take your favorite pictures of the kids from the past year and make your Dad, Father-In-Law, Husband or Grandfather a 12*12 "Year in the Life" scrapbook layout (see sketch for layout idea). Then, put it in a frame, so they can show off their beautiful family at the office!!
Monday, May 08, 2006
Big Bix Bargains
Target, for example, has an actual scrapbook section, but if you go a few aisles over to the card section, you will find some cute epoxy stickers...that always seem to be on clearance. You can also get paper clips in a variety of shapes and sizes in the school supplies aisle:
The options are obviously limited, but whose not for saving a little money every now and then!
Wal-Mart, too, has a good selection of scrapbooking basics and some of the best prices we've seen. EK Success Adornaments Scrapbook Fibers are only $5.00 and Vario Tab Refills are less than $6.00 - both $1.00 plus less than what you'll find at most stores.
Happy Saving!!
Tuesday, May 02, 2006
Making Your Own Patterned Paper
Looking for a unique way to add a baby's birth date to a scrapbook layout or handmade announcement?
Just go into Microsoft Word, or your word processor of choice, and type in baby's birth date in various font types and sizes (even do different date formats). Do about five lines to create some variety, copy and paste it several times to create a large block of text (your pattern) and then print it out onto cardstock that will match your layout. Then, all you have to do is cut it to fit the size of the scrapbook element (e.g., a 2" x 8" strip).
Toddler Art
If you have a toddler around the house that is just getting into crayons, have them create some patterned paper for you! Just sit them down with a sheet of white cardstock, some crayons and let them color away.
Take pictures of them while they're doing it and you've got the makings of an adorable layout!!
Saturday, April 01, 2006
Subscriptions for Soldiers
For more information on the program, including how to make a donation, go to Subscriptions for Soldiers. For Soldiers interested in signing up for free subscriptions, send an e-mail to information@subscriptionsforsoldiers.com.